How to make animated videos with Claude Code, in any style
One detailed prompt sets it all up: 66 film styles, voices, sound and rendering, plus a skill written for your channel. No animation app, no editor.
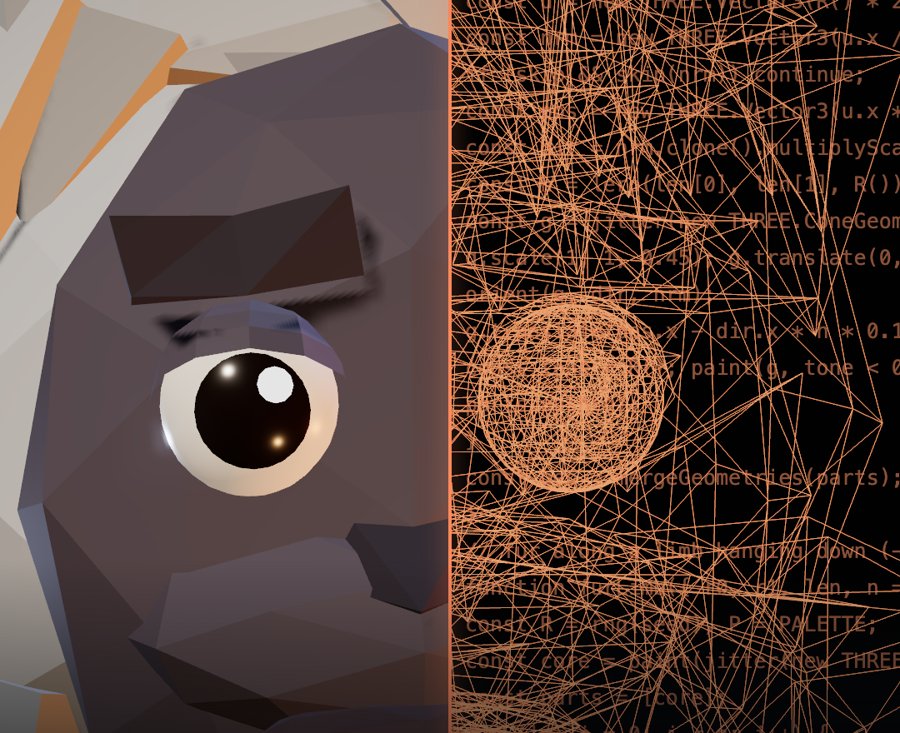
From "every frame is code". You asked for SETUP, so here's everything.
Rather have setups like this ready-made? That's the Yeti Vault. The waitlist gets first access and an extreme launch discount. See what's coming.
There's no animation app behind these videos. Claude Code writes the scenes as code, a local model does the voices, Python makes the sound, and a headless browser draws every frame. Set it up once and each new video is a conversation.
You don't have to build any of that from zero. Lemo-Opuscar is a free, open-source library by LemoLab with 66 film styles, from whiteboard explainers to pixel RPGs. Our own engine borrows from it too: its style notes and instrument samples are in our setup, and the Yeti and the app screens are ours. The prompt below installs the library, then writes a skill on top of it that's about your channel.
step 1
Install Claude Code and the library
curl -fsSL https://claude.ai/install.sh | bashOpen a new terminal, then add the library and start Claude in a folder for your videos:
claude plugin marketplace add lemomo-ai/lemo-opuscar
claude plugin install lemo-opuscar@lemolab
mkdir ~/videos && cd ~/videos
claude
The first run asks you to log in.
step 2
Paste this prompt
This sets everything up and writes your skill: one file that teaches Claude how you make videos, loaded whenever you ask for one. It asks before anything big and stops at each checkpoint.
I want to make short vertical videos entirely in code, with no AI video model and no editing app. Use the lemo-opuscar skill as the engine and write my own skill on top of it. Work through these five stages in order, and stop wherever I say to stop.

STAGE 1: CHECK MY MACHINE
- Run the lemo-opuscar setup so the library is ready, then install its core tools and voice tier.
- Check for Node 20+, ffmpeg 7+, and Python 3.11 to 3.13 (or uv). If something is missing or too old, give me the exact install command for my system and wait. Don't install system software without asking.
- Tell me the size of any big download first. Only fetch the instrument samples a film actually needs, not the whole collection.
- Check how much memory my machine has and pick a number of render workers that won't freeze it. Use 1 if you're unsure.

STAGE 2: ASK ABOUT MY CHANNEL
Ask me one question at a time, with a few options and your recommendation first. "You decide" is always a valid answer. Don't assume an audience or a personality I haven't told you.
1. What are my videos about, and who are they for?
2. Which platforms, and how long? (Default: Reels, TikTok and Shorts, 30 to 60 seconds.)
3. What format? One narrator, two characters talking, or captions only with no voice.
4. Do I want a recurring character? If so, what do they look like and what are they called?
5. What voice? Offer three Kokoro voices with a short sample of each, or my own recording.
6. Do I have brand colours, fonts, a logo or a handle to use?

STAGE 3: WRITE MY SKILL
Write ~/.claude/skills/reel/SKILL.md so it loads whenever I ask for a video, reel or short. Keep it short and point to the library instead of copying it. Include:
- My channel: only what I told you in stage 2.
- Format: render everything at --size 1080x1920 and lay pages out from innerWidth and innerHeight. Keep text and faces out of the top 15% and bottom 20%, where the app's buttons sit.
- Opening: the first frame shows what the video is about, and the first word is spoken in the first half second.
- Captions: large and easy to read, timed to the voice, on every spoken line.
- Voice: voice each sentence separately and join them with short pauses. Check every line with the library's speech-to-text check.
- Sound: a sound on every on-screen action, music about 10 dB below the voice, final mix at -14 LUFS.
- Styles: my shortlist from stage 4. A style's STYLE.md decides the look; the story comes from me, never from the style's demo film.
- Review: write a treatment first, then show me 5 stills and wait for my OK before any full render.
- Budget: when trying a new style, make one still first, then a 15-second clip, then a full video.
- Rights: no real people, brands or logos unless I say I have the right to use them.
- What I've learned: a running list. Each time I correct something, offer to add it as a one-line rule so future videos start better.
Show me the file and wait for my OK.

STAGE 4: PICK MY STYLES
Show me the library's full style list and this gallery, where every style has a demo film: https://lemomo-ai.github.io/lemo-opuscar/
Suggest three styles that suit my channel, with one line on why. Once I've chosen three, draw the same moment from my topic in each one as a single 1080x1920 still and show them side by side. Don't make any video yet. Ask which one I want as my default, then save my choices to my skill.

STAGE 5: MAKE A TEST CLIP
Ask me for one line of story, then make a 15-second video in my default style: treatment, then 5 stills, and wait for my OK. Then do the full render with voice, music and sound effects, and run the library's checks on the finished file.

When it's done, tell me where the video is, how long it took, the three weakest things about it, and exactly what to type to make the next one.
Expect some permission prompts. The test clip can take a while, and a full film takes about 30 to 60 minutes.
Prefer to build from scratch?
This is the full version of the shorter prompt in the video. It makes one look of your own, with no library:
Create a Claude Code skill at ~/.claude/skills/reel/SKILL.md for making 9:16 animated videos entirely in code:
- Three.js scenes, where every animation is a pure function of time t, so any frame can be re-rendered on its own
- Voices with kokoro-onnx (local and free) in a Python 3.12 venv; build the timeline from the measured voice lengths
- Sound synthesized in Python with numpy
- Render frames in headless Chrome with puppeteer-core and my installed Chrome; encode with ffmpeg (use the imageio-ffmpeg pip package if ffmpeg isn't installed)
- Always render 5 still frames and wait for my OK before a full render
Then install what it needs and make a 10-second test clip of a low-poly character saying one line.
step 3
Pick a style, describe a scene
Name a style and tell it what happens, not how to code it:
Use the reel skill. 30 seconds in the Whiteboard Explainer style.
Topic: why your phone battery drains faster in the cold.
Show me stills first.
Stills by LemoLab, CC BY 4.0, resized.
Good styles to start with
Grouped by the kind of video. These are our suggestions, so watch them all in the gallery.
Then give notes
Look at the stills and say what's wrong, the way you would to an animator:
- "The eyes look dead. Bigger pupils, two highlights."
- "The caption covers his face. Move it down."
- "Too dark. Add a light behind her."
Let it save each fix into your skill. This is what makes video 10 much better than video 1.
Want a look nobody else has?
Change a library style, or describe one from nothing. It plans with you, shows one frame, makes a short demo, and keeps the result in ~/lemo-my-styles/.
I want to change the Mid-century Cartoon style into my own version for my channel, at 1080x1920.Start from a blank page: a chalk-on-blackboard style, warm and slow, at 1080x1920.step 4
Voices and sound
- Voices: Kokoro runs on your machine for free, and it's the library's default for English. Good ones to try:
af_heart,am_fenrir,am_michael,bf_emma. Your own recording works too. - Check the words: Claude can't listen. Your skill has it run every line through speech-to-text and compare it with the script, which catches misread words.
- Sound: the library writes original scores from free sample libraries and makes sound effects in Python. Say so if a video needs more or less of either.
step 5
Render
Render the full video.Ours is one command, from our own engine:
node render.mjs studio video --scene ep4.jsYour skill uses the library's version. Because every frame depends only on the time, a change means re-rendering just that part, not starting again.
if you get stuck
When things break
Claude hesitates to run the library's setup script
It downloads the library from GitHub. Read the script yourself if you'd like to, then tell it to go ahead or not. It's your call.
ffmpeg is too old
Versions before 7 can make the final step reject the file as cut off. Update ffmpeg.
Python errors while installing Kokoro
Use Python 3.11 to 3.13 and the kokoro-onnx package. Keep the project in a short path: a very long folder path gives an espeak-ng-data/phontab error.
Your computer slows down or freezes
Rendering is heavy. Quit other apps and tell Claude to use one render worker. 3D styles are the hardest on older machines.
The picture is blank or black
Ask it to check the page's console errors and whether WebGL started.
Something looks wrong at one moment
Render a still at that exact second and describe what you see.
Costs
The library, Kokoro and ffmpeg are free. You pay for Claude, and a film uses a fair amount of it, so test with short clips.
Lemo-Opuscar is by LemoLab, MIT licence. We're not affiliated. Films you make with it are yours, with no credit needed. Check the licence of anything else you add, such as music, photos or voices.
You're in
We'll let you know when new guides are out. Now go paste that prompt.
A link to this guide is on its way too.